
Over 90% of structural pottery failures, such as cracks, warping, or weak joins often can be traced back to one overlooked material: slip. If you’ve ever wondered what is a slip in pottery, it’s more than just liquid clay. It’s the foundation of strength, design, and precision. Understanding slip is the first step toward building more durable, consistent, and professional ceramic pieces.
Slip is created by suspending fine clay particles in water to form a smooth, creamy mixture. You’ll use it to bond parts together, decorate surfaces, or cast forms with technical accuracy. But for it to perform correctly, both the recipe and timing must match your clay body and workflow.
This is exactly what we’ve mastered at Dongsheng Ceramic Co., Ltd.. With over 25 years of ceramic manufacturing experience, a 20,000 sqm factory, and partnerships with retailers like Target, Kmart, and Disney, we produce slip-cast ceramics with unmatched consistency, quality, and precision built for global standards.
Read on to discover how slip truly works and how you can use it to improve every part of your ceramic process.
Slip in pottery is a colloidal suspension of clay particles dispersed in water. Scientifically, it functions through the balance of solid content and liquid medium, typically maintaining a viscosity similar to heavy cream.
This fluid system depends on particle size, concentration, and mixing method. Most slips are prepared using the same clay body as the ware to avoid differential shrinkage during drying and firing, an essential step in preventing structural failure.
After soaking dry clay fragments, water molecules penetrate and disaggregate the particles. Mechanical mixing or blunging then distributes these particles uniformly.
The final slip must remain chemically and physically compatible with the ceramic body, as any variation can cause warping, delamination, or cracking.
Slip works through adhesion and cohesion. When applied to a surface, the water in the slip penetrates the porous clay body and allows clay particles in the slip to settle and bond with the substrate.
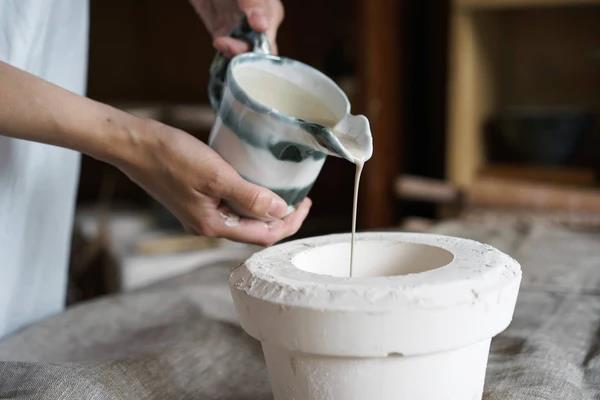
During drying, the water evaporates, and the fine clay particles interlock with the surface texture. In joining, scoring increases surface area and creates mechanical interlocks, enhancing the bond. In casting, plaster molds absorb water from the slip, depositing a uniform clay layer against the mold wall.
The remaining slip is drained, leaving a formed shell. Proper viscosity and particle dispersion control this process precisely.
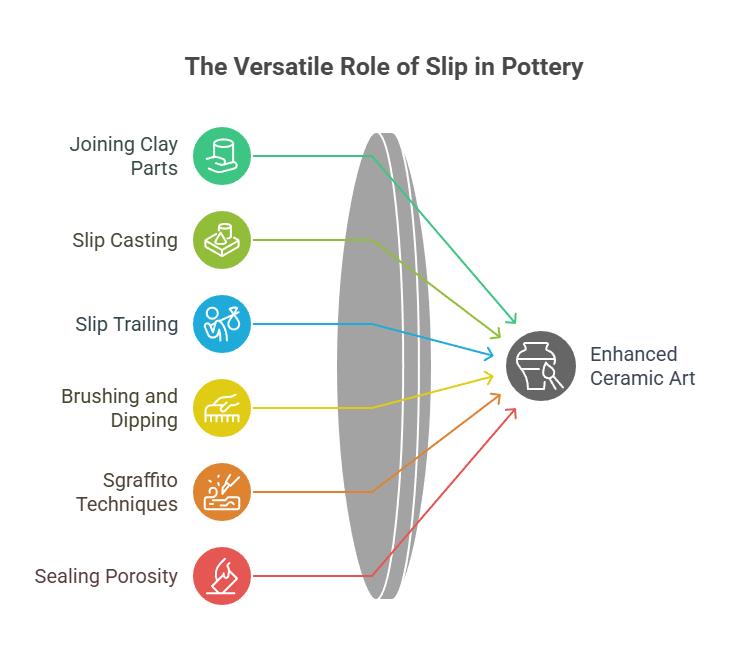
Slip is more than just liquid clay. It’s a technical material used in various stages of ceramic work. Below are the most common and valid use cases in pottery:
Slip acts as a binder during hand-building. When applied to scored surfaces, it creates a mechanical and molecular bond between components like handles, spouts, or added relief elements.
Pouring slip into plaster molds forms consistent hollow or solid ceramic shapes. The mold absorbs water, leaving a dense clay layer that matches the mold cavity precisely.
Using thickened slip in a squeeze bottle, potters trail raised designs onto leather-hard clay. These decorative lines remain after firing, adding texture and dimension.
Slip can be brushed or dipped to coat surfaces with color or texture. It's often used to prepare a surface before carving or to mask imperfections in clay.
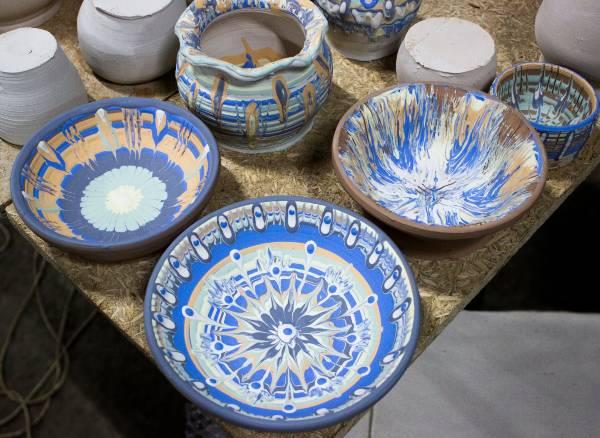
A colored slip is applied over clay, then partially carved away to reveal contrasting layers. This technique produces fine line art and precise pattern work on ceramics.
A thin layer of slip applied to bisque-fired ware can reduce porosity. This promotes even glaze application and prevents glaze from absorbing unevenly into the ceramic body.
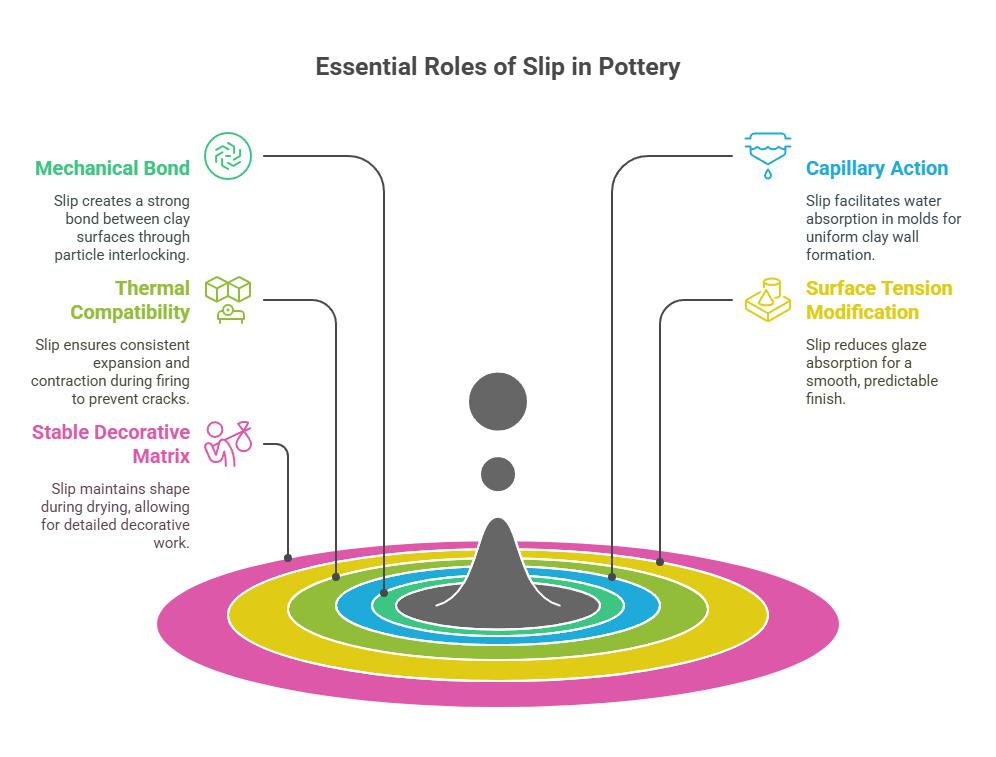
Slip supports essential ceramic processes at every scale. Below are six technically grounded reasons it's critical in both handmade and industrial pottery.
When you apply slip to scored surfaces, clay particles settle into the grooves. The water migrates into the host body’s pores. Capillary action draws particles closer, while hydrogen bonding and mechanical interlocking begin.
As the moisture evaporates, van der Waals forces between clay layers increase, forming a dense, unified structure.
In casting, you pour slip into porous plaster molds. The plaster rapidly draws water out of the slip through capillary suction. This deposits a uniform clay wall layer against the mold.
You can control the wall thickness by adjusting the timing. A properly deflocculated slip with additives like sodium silicate improves particle dispersion, allowing higher solids content and reducing drying shrinkage.
Using slip from the same clay body aligns thermal expansion coefficients. During firing, different clay compositions shrink or expand at different rates. A mismatched slip layer can delaminate or crack.
You avoid this by preparing a slip with identical mineral content and particle size as the main body. This compatibility is especially important in high-temperature firings where vitrification occurs.
A thin layer of slip modifies the surface energy of bisque-fired ware. This reduces excessive glaze absorption, especially on open-pore earthenware.
The slip acts as a buffer layer. It closes microvoids and stabilizes surface tension, giving you a more predictable glaze application. This technique also prevents crawling and pinholing during glaze melt.
When used for decoration, such as slip trailing or brushwork slip must maintain shape during drying. Its thixotropic behavior lets you apply it fluidly, but once at rest, it holds its form.
This is achieved by controlling clay particle flocculation. Studio artists benefit from this behavior to build dimensional lines or layered textures without deformation.
Slip isn't one-size-fits-all. Different types of slip are formulated for specific techniques in pottery from decoration to casting. Here are the most common types you'll work with:
1. Clay Slip: Made from the same clay body you're using, this type is ideal for joining parts and basic surface work. It maintains chemical and thermal compatibility, reducing stress during drying and firing.
2. Casting Slip: This deflocculated slip contains sodium silicate or soda ash. It has a high solids content but stays fluid. Used for slip casting into plaster molds, it forms thin, even walls as the mold absorbs water.
3. Engobe: Engobe is a slip blended with added flux and sometimes silica. It's used for colored surface layers and can be applied to both greenware and bisque. Its lower clay content makes it more stable after application.
4. Colored Slip: Standard clay slip mixed with oxides or stains for decoration. You can trail, brush, or layer it on greenware for precise visual contrast and texture in low- to mid-fire work.
5. Terra Sigillata: An ultra-refined slip made by settling and decanting fine particles. It’s used to create a smooth, burnishable surface, often with a soft sheen. Ideal for decorative low-fire pottery.
6. Slip Slurry: This thicker version of clay slip is used in structural joining, especially where scoring is involved. It’s often made by reclaiming dried clay scraps soaked in water, then mixed to a dense paste.
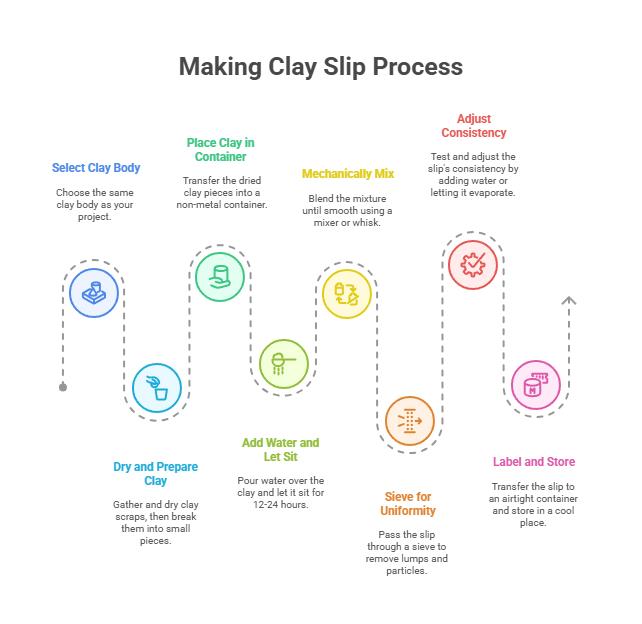
Slip is a clay-based suspension that requires careful preparation. If you want reliable results in construction or surface work, your slip must match your clay body in both composition and behavior.
Follow this in-depth, controlled process to make studio-grade slip.
Use only the same clay body that you’re using in your project. This step is critical. Every clay body has a unique shrinkage rate, plasticity, and thermal expansion coefficient. Mismatched slip can lead to cracking, delamination, or warping during firing.
Tip: If unsure of the clay body, do not mix different types. Keep all scrap organized by type.
Gather leather-hard or bone-dry scraps. Let them air dry completely. Water-saturated or plastic clay won’t break down evenly and may form lumps.
Transfer the dried pieces into a non-reactive container plastic or ceramic is best. Avoid metal, which may react with additives or oxides during mixing and storage.
Use a tall, narrow container for easier blending and less surface evaporation.
Pour in just enough clean water to fully cover the clay pieces. Don’t overfill. Let this mixture sit undisturbed for 12–24 hours. During this time:
This stage forms the base colloidal system of your slip.
Tip: Use distilled water if your local supply is high in dissolved salts.
Once the clay is fully soaked, mix it thoroughly using:
Blend until the slip has no visible lumps. The texture should resemble thick cream or yogurt, fluid but not watery.
Note: Mixing breaks down larger agglomerates and improves particle dispersion.
Pass the mixed slip through a fine mesh sieve (80–100 mesh). This step removes grog, large particles, and unmixed lumps that could cause cracking or poor adhesion.
Tip: Hold the sieve above a second container and stir the slip through slowly using a rubber spatula or gloved hand.
Test the viscosity:
Too thick? Add small amounts of water and remix.
Too thin? Let it sit uncovered until water evaporates to the desired consistency.
Note: Measure solids content using a hydrometer for precision, especially in large batch slip casting.
Transfer the slip to an airtight, labeled container. Include:
Store in a cool, stable environment. Stir thoroughly before each use and settling will occur.
Tip: Never store near heat or in direct sunlight. Slip can spoil or dry unevenly.
Slip can enhance your pottery if applied correctly. But small errors in timing, technique, or consistency often lead to cracks, peeling, or weak bonds. Here's how to avoid those pitfalls with precision:
Slip and glaze might look similar during application, but they behave very differently during firing. Each plays a distinct role in ceramic processes like one as a clay-based coating, the other as a glass-forming surface.
| Aspect | Slip | Glaze |
| Composition | Clay particles suspended in water | Silica (glass former), flux, and alumina in water |
| Base Material | Made from the same or similar clay body | Made from mineral and chemical compounds |
| Purpose | Joins parts, decorates, modifies surface texture | Creates a smooth, often glossy or matte glassy surface |
| Application Stage | Applied to wet, leather-hard, or greenware clay | Applied to bisque-fired or bone-dry clay |
| Firing Behavior | Integrates with the clay body; shrinks similarly | Melts and forms a vitrified surface layer at high temperature |
| Surface Effect | Matte, textured, or colored depending on additives | Glossy, semi-matte, or satin depending on formula and firing atmosphere |
| Use in Decoration | Used for slip trailing, sgraffito, brushing, dipping | Used for full surface coverage or painted effects before final firing |
| Thickness Applied | Thicker than glaze; often dimensional | Thin, even coating; applied in multiple layers or dipped |
| Sealing Properties | Slightly seals but remains porous unless glazed on top | Fully seals the surface and makes it food- and water-safe |
| Firing Compatibility | Must match the clay body for drying and thermal expansion | Must be compatible in expansion rate with clay to prevent crazing/shivering |
Slip may seem like a simple material, but its role in pottery is anything but basic. From forming strong bonds to enabling precise casting and decoration, it’s a key factor in both performance and presentation.
Whether you're refining your hand-building skills or producing ceramics at scale, understanding slip gives you control over the outcome of your work.
At Dongsheng Ceramic Co., Ltd., we bring technical mastery and large-scale capability to every ceramic piece we produce. For custom slip casting, high-volume production, or wholesale ceramic solutions, trust the team with decades of proven results.
Contact us today and bring your ceramic vision to life with expert support.
1. Can I add color to slip?
Yes, you can blend ceramic stains, oxides, or carbonates into slip to create colored decorative effects. Mix them evenly into the wet slip to avoid blotching or streaks after firing.
2. How long does prepared slip last?
Slip can remain usable for months or even years if stored properly in an airtight container. However, water can evaporate over time, so you’ll need to stir and rehydrate it before use.
3. What happens if I use too much slip?
Over-applying slip, especially in joins or decorative layers—can cause uneven drying, warping, or peeling. It may also weaken the structure by leaving air pockets or soft seams.
4. Is slip food-safe on its own?
No. Fired slip remains porous and can absorb liquids or bacteria. To make pottery food-safe, you must apply a proper glaze layer over the slip and fire it to vitrification.
5. Can slip be applied to bisque-fired ware?
Only specific formulations like engobe will adhere to bisque-fired surfaces. Standard clay slip lacks the plasticity and shrinkage compatibility needed and usually flakes off after drying or firing.
6. Does slip need to be fired?
Yes. Slip must be fired to bond permanently with the clay body. Until fired, it remains fragile and water-soluble, especially when used for structural or decorative purposes.
2026-04-02
2026-04-02
2026-01-19
2026-01-19
2025-12-17
2025-12-17
2025-12-04
2025-12-04